Assume the signs are expendable. If they are not destroyed by competitors, the weather or those who just don't like political signs, they will be destroyed by professional sign installers the morning after the election when they clean the city of all political signs as part of their contractual requirement. They may not get to the smaller intersections, so you may be able to salvage a few signs as you comply with your candidacy requirement to remove all political signs within a week or less after the election, but they will be few.Large signs can have enough room for a discernible message, but most advise that signs are primarily for name recognition. Large signs are expensive to acquire and difficult to install. The bigger they are, the more support they require. And, frankly, Libertarians have more to say than Republocats.
Traditionally, the best way to get a message out is by paying the price for a candidate statement in the ballot booklet. If you're flush with cash, newspaper, radio and TV ads are even better. However, with Web sites accessible to most voters, another approach is practical. That is to put only a domain name on signs.
All the issues are described on the Web site, and all of the Web sites link to a list of the sites of all the other Libertarian candidates in the County (Region). The list includes links to the State (Governor, etc.) and Federal (Senator, President, Vice President, cabinet) sites on the ballot in that county. Signs and candidate statements have space limitations. Ads have price limitations. All should reference a domain name where all the candidate positions are delineated and emphasized with photographs and graphics.
If the domain name is short, it is not only easily remembered, but also can be used effectively on small, less expensive signs. The Regions should acquire domain names for all the voting districts within their territory, so domain names like AD23.org for Assembly District 23 can be used every election. Similarly, the State organizations should acquire CASenator.org, CAGov.org, etc. for all the state elective offices. Similarly, the National LP should acquire Pres.org and VPres.org, or whatever is available in this regard.
Then the same signs can be reused for every election. That makes it worthwhile to invest more in the quality and size of each sign, and to notify the professional sign installation companies that the Libertarian signs will be recovered after the election for subsequent use. To leverage this approach with environmentalists, a small recycling logo should be printed on each sign.
Such signs and frames could justifiably be made of surplus stainless steel, and the signs painted with reflective paint. Some signs could even be self-illuminated with battery-powered lights that reflect off the reflective paint at night, and are charged and controlled with solar cells. An array of LEDs that outline the letters or other non-reflective use of lights is not recommended, because they would be rendered ineffective by automobile headlights and street lights.
- Conventional signs on wood stakes
- Budget signs in wire frames
The signs are typically silk-screened on water-resistant paper by professionals. The least expensive wood stakes for the purpose are concrete form stakes available from any lumber yard. They can be difficult to drive into the ground and may split. The signs alone can be an expensive proposition ($600 for the California 51st Representative District). Metal supports may be more appropriate in some situations.
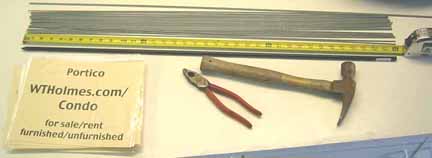
Tools
- Leveraged (Swingline $13) or hammer stapler and 3/8" to 1/2" staples.
- Clear packing tape and dispenser with cutter for applying signs wherever staples won't work (chain-link fences, windows).
- Palm grip standard office stapler for stapling signs back-to-back at edges where appropriate,
- Staple remover or standard pliers for removing staples to fix a sign or flatten a previously used surface.
- Standard wood stakes for construction (concrete forms) 1-1/2" wide x 3/4" thick x 3' long ($14 for 50) for supporting signs on open ground. Longer or thinner stakes are difficult to force into ground and staple to.
- Sledge hammer for pounding stakes into resistant ground. 3-lb sledge will handle most jobs.
- Claw hammer or equivalent for removing nails and other previous sign residue.
- Hand auger with 12"-18" long 1" or better bit for making impervious ground more receptive.
- Head light (miner's light) so both hands are free.
- Small truck or Mini-van with walk-thru to rear with seats removed and side door exit.
Where to install signs
- Under street lights angled away from the audience so that the maximum light is reflected from the overhead light to the audience.
- On existing stakes - below sign of other candidate or on stakes remaining after "original" sign was blown-off (beware of prevailing winds) or removed.*
- On legs of "For Lease" signs.*
- On windows of unoccupied buildings, especially in strip malls.*
- On the support posts of small trees, especially where pairs of posts support one tree.*
- On secondary streets not frequented by professional sign installers.
* Beware that some jurisdictions prohibit such practices.
Installing signs
DO NOT pre-attach signs to stakes. Each situation will warrant a different installation technique. If a stake must be used, install it first, then affix a sign to it. Hammering a stake with a sign on it into the ground will invariably tear the sign at the stables and cause it to fall off if not immediately, then after the next breeze, or the stake may split, necessitating the removal and reinstallation of the sign.
Although 10:00 p.m. to 5:00 am is best and sign installation is must faster with two or three people, sign installation can be done as a part of your daily process, like driving home from work along different routes.
- Three people - One driver, one stake installer on the van floor and one sign installer in the passenger seat.
- With three people, sign installation can be done so quickly that you can obstruct traffic without incurring the wrath of motorists.
- Stakes
- Driver with aide of passenger(s) spot target of opportunity, enables emergency flashers,stops at installation site and notes location on map.
- Van floor person exits with hammer and stake, and hammers stake into ground.
- Passenger seat person exists with stapler in hand, grabs sign from van floor and staples sign on stake.
- Van floor person observes positioning relative to traffic and street lights, and adjusts sign if necessary.
- Tape
Driver as above.
- Van floor person exits with sign and holds it in place.
- Passenger seat person exits with packing tape dispenser and tapes sign to fence or glass. BE CAREFUL not to scratch glass with dispenser cutting edge!
- Two people - One driver and one stake and sign installer on the van floor.
- Stakes
- Driver as above, but also sets parking brake and places transmission in park or neutral,
- Van floor person as above.
- Driver as per passenger above.
- Van floor person as above.
- Tape
Driver as above.
- Van floor person as above
- Driver as above.
- One Person - Driver does it all.
Periodically check staple and tape supply to avoid having to return to van to resupply. Periodically check engine temperature, because idle and start/stop driving can cause engine to overheat. More than three people tend to get into each other 's way --Better to have more teams of installers than lots of installers in one team. If more teams, designate disjoint installation areas for each.
These are very inexpensive to make and easier to install, particularly by one person. They are perfect for yard signs and can be effective at intersections if strategically placed in larger quantities than those of your competitors. They install easily by hard in soil, cracks and chain link fence, and tolerate wind well. They can be installed in a series, as in the famous Burma Shave roadside ads before environmentalists destroyed property rights. The rhymes were entertaining and made drivers eagerly anticipate the punch line.
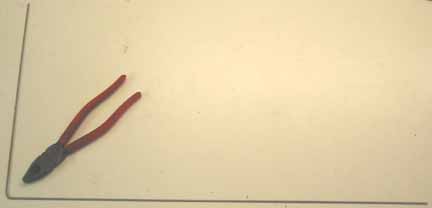
In some areas there may be no penetrable soil or cracks. Use a steel rod like that shown below and a hammer to make a hole for the wire leg(s).
Making the signs
Copy image, e.g. SD23.org ($010 to $0.27/page) onto both sides of stock. Standard 20 weight yellow paper ($8.88 for 500 sheets) is least expensive, but 70-120 weight paper or white card stock ($7.99 for 250 sheets) is better for ease of installation and keeping the signs flat. Use white, yellow, light green or light blue paper. Human eyes see more variations of green than any other color. The bright yellow-green used on fire engines is best, but light blue is more libertarian. Red is obnoxious.
If using 8.5X11 inch stock, insert each into a protective binder envelope ($0.07 each). An 11-inch length of wire can be inserted in the bottom of the envelope to help it resist wind. Tape the edge closed to waterproof the sign and provide holes for attachment to the frame.
If using larger paper, paper and copy costs are of course more, but double sided copies are not necessary, because a U-frame will likely be used for a specific orientation. In the rare event that text on both both sides is useful, a second sign can be attached. Use clear spray paint to protect the paper from moisture.
Making the frames
Acquire one-eight inch diameter, twelve feet long ceiling tile hanging wire for $0.11 to $0.22 each. Cut it into 3-foot lengths if making single-leg hangers, 4-foot lengths if making single-leg hangers for high weed areas or for two-leg hangars (upside down U-shape) for 8.5x11 inch signs, or 6-foot lengths for 11x17 inch signs. The one-leg frame is best for overhanging sidewalks or difficult penetration areas where finding two cracks or soft spots the necessary distance apart is difficult, but it will twist in the wind to undesirable orientations if not inserted into the soil at an angle so it returns to the desired orientation.
- Lay the wires on a flat surface and massage them until they are parallel.
- Draw a line across all of the wires at once using a permanent marker to mark the cut and bend points.
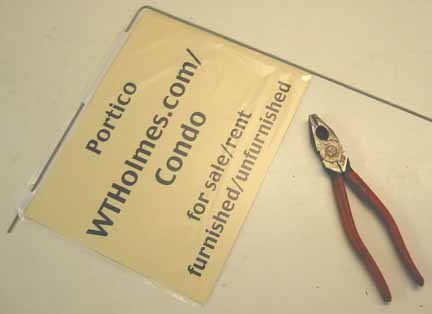
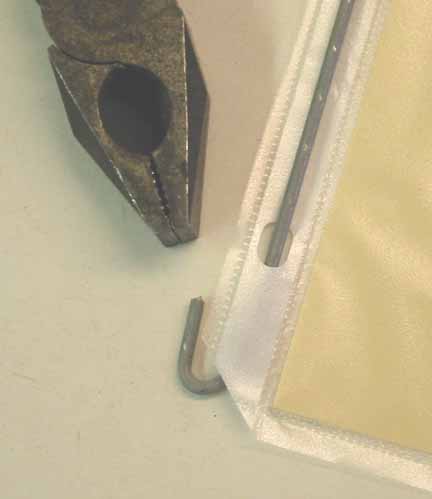
- Cut the lengths. A heavy duty pliers/cutter combination like that shown below is best.
Single leg frame:
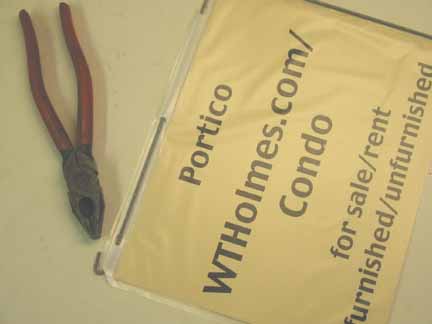
I made these signs for advertising my condo, but they serve the purpose. Bend as shown below, but the resulting angle should be more than 90 degrees in anticipation of installing at an angle so the sign will revert to the desired orientation after a gust of wind.
Thread the sign onto the frame.
Bend the end of the sign hanger 180 degrees to keep the sign on the hanger.
Enlargement:
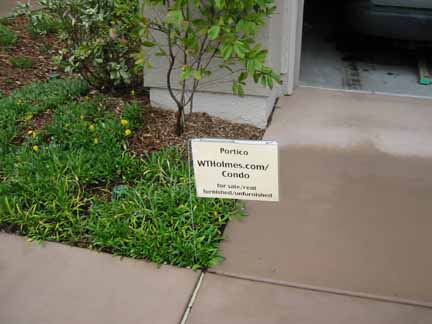
Finished product:
These signs cost me $0.03 stock + 0.10 printing + 0.07 cover + 0.04 wire = $0.24 each.
If not using protective envelopes, place the sign face up on a clean release surface. Apply clear packing tape to the top of the sign. Peel the sign from the surface and reverse the sign. Lay the top of the wire frame on the tape. Fold the tape over it. Adjust the legs so they are parallel to the sign edges. A length of wire can be taped to the bottom of the sign to keep it more vertical in windy conditions.
If wind is not a concern like it is in Antelope Valley, tape the edges of the sign to the legs as well. Then the sign can be leaned back to the reflect light from overhead street lights.
Installing the signs
Just push the leg(s) into the ground. Insert the leg of single-leg signs at an angle to maintain a particular orientation. Then bend the cross arm so the sign is horizontal. Inserting the leg vertically and then bending it will defeat this intent. Keep the leg straight.
There is always soft ground adjacent to sprinkler heads. Pre-boring the hole(s) with a steel rod (net fence post from Home Depot) and hammer may be necessary in some areas. Use street lights to advantage as described in How to install signs above.
Place at the corner of busy street intersections with signals that leave drivers with nothing to do but read a sign while they wait for the light to change.